What Is HDR Photography? A Complete Guide for Photographers
If you’ve ever scrolled through travel or landscape photography and marveled at images where every shadow is detailed, every highlight is preserved, and the scene looks almost hyper-real—chances are, you were looking at an example of HDR photography. High Dynamic Range (HDR) photography is a powerful technique that allows photographers to capture scenes with extreme contrasts in light—like a bright sky above a dark forest or a sunlit window in a dim interior—without losing critical detail.
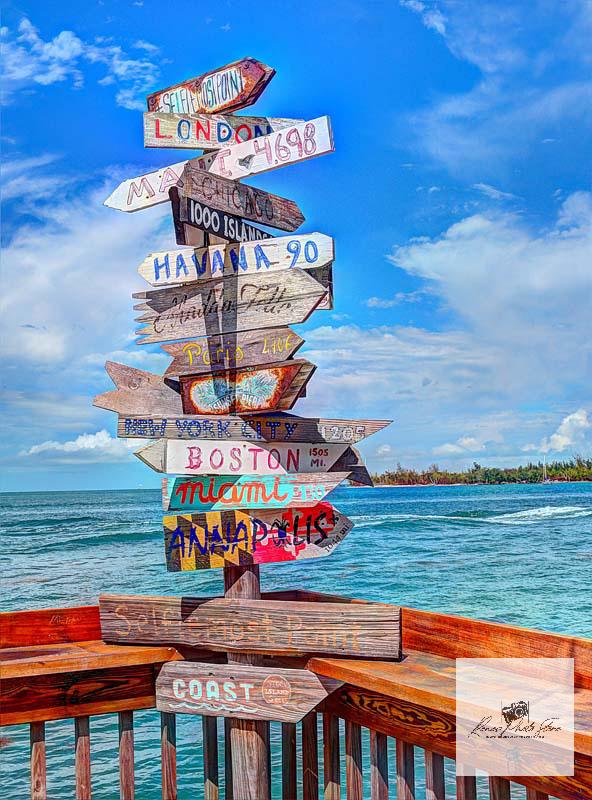
As a photographer documenting trips to cities around the world, you’ll frequently encounter lighting challenges that standard single-exposure photography can’t handle. That’s where HDR photography comes in. Whether you're shooting the neon glow of Tokyo at night, the golden-hour architecture of Paris, or the sun-drenched alleys of Marrakech, mastering HDR can elevate your photo blog with breathtaking, balanced, and dynamic images.
In this comprehensive guide, we’ll explore:
- What HDR photography is
- How it works technically
- When and when not to use it
- Step-by-step techniques for capturing and processing HDR images
- Common misconceptions and pitfalls
- Tools and software to enhance your HDR workflow
- Creative applications in travel and city photography
Let’s dive in.
Understanding Dynamic Range: The Foundation of HDR
Before we explore HDR photography, it’s essential to understand what dynamic range means.
Dynamic range refers to the ratio between the brightest and darkest tones a camera sensor (or the human eye) can capture in a single image. In real life, your eyes can see incredible detail in both shadows and highlights simultaneously—walking into a sunlit room from outside, for instance, your vision adjusts almost instantly.
Cameras, however, have limitations. Most consumer and even professional cameras can only capture a limited dynamic range in a single exposure. This means that if you expose for the highlights (e.g., a bright sky), the shadows become too dark. Expose for the shadows (e.g., a dimly lit street), and the highlights get blown out (overexposed).
HDR photography solves this problem by combining multiple exposures of the same scene into one final image that preserves detail across the entire tonal range.
How HDR Photography Works
HDR photography involves capturing three or more images at different exposure levels:
- Underexposed (dark) – Captures highlight details (e.g., clouds in the sky).
- Correctly exposed (middle) – Balanced exposure for midtones.
- Overexposed (bright) – Reveals shadow details (e.g., textures in dark alleys).
These exposures are then merged using software (like Adobe Lightroom, Photoshop, or specialized HDR tools) to create a single image with a much broader dynamic range than any one shot could achieve.
This process is called exposure bracketing. Most modern DSLR and mirrorless cameras have an Auto Exposure Bracketing (AEB) feature that automatically takes multiple shots at different exposures with just one press of the shutter.
Example:
You're photographing a cityscape at sunset. The sky is ablaze with color, but the buildings below are in deep shadow. A single exposure will either blow out the sky or leave the buildings as silhouettes. With HDR, you take three shots:
- One exposed for the sky
- One for the buildings
- One balanced
Merge them, and you get a photo where both the fiery sunset and the intricate details of the urban landscape are perfectly visible.
When to Use HDR Photography
HDR is not a one-size-fits-all solution. It shines in specific situations:
1. High-Contrast Scenes
- Sunsets and sunrises
- Interior shots with windows
- Backlit subjects
- City skylines at golden hour
2. Architectural and Real Estate Photography
- Capturing both bright exteriors and shaded interiors
- Showcasing details in both shadowed corners and sunlit facades
3. Landscape Photography
- Mountains with bright skies and dark valleys
- Forests with dappled sunlight
4. Travel and Urban Photography
- Narrow alleys with bright openings
- Historic buildings with deep shadows and bright highlights
When Not to Use HDR
While powerful, HDR isn’t always the right choice. Avoid it in the following scenarios:
- Moving subjects – People, animals, or vehicles can cause “ghosting” in the final image due to misalignment between exposures.
- Low-contrast scenes – If the scene already has balanced lighting, HDR may add unnecessary noise or artificial-looking contrast.
- Fast-paced shooting – HDR requires multiple shots and post-processing, making it impractical for action or street photography on the move.
Step-by-Step: How to Shoot HDR Photos
Follow this workflow to create stunning HDR images on your next city trip:
Step 1: Use a Tripod
Stability is crucial. Even slight movement between shots can cause misalignment. A tripod ensures your frames line up perfectly.
Step 2: Enable Auto Exposure Bracketing (AEB)
Set your camera to take at least three shots: -2 EV, 0 EV, +2 EV. Some cameras allow up to 7 exposures for extreme dynamic range.
Pro Tip: Use a remote shutter or 2-second timer to avoid camera shake.
Step 3: Shoot in RAW
RAW files retain more data than JPEGs, giving you greater flexibility in post-processing and better results when merging exposures.
Step 4: Use Manual Focus
Autofocus may shift between shots. Set focus manually after composing your shot to keep everything consistent.
Step 5: Shoot in Aperture Priority or Manual Mode
Keep the aperture constant across all shots to maintain consistent depth of field. Only the shutter speed should change.
Step 6: Capture the Sequence
Press the shutter (or use continuous shooting mode) to capture your bracketed exposures.
Processing HDR Images: From Brackets to Brilliance
Once you’ve captured your exposures, it’s time to merge and refine them.
Software Options:
-
Adobe Lightroom Classic
- Go to Photo > Photo Merge > HDR
- Automatically aligns images and blends exposures
- Offers de-ghosting for minor movement
-
Adobe Photoshop
- File > Automate > Merge to HDR Pro
- More control over tone mapping and color grading
-
Dedicated HDR Software
- Photomatix Pro – Industry favorite with advanced tone mapping
- Aurora HDR – User-friendly with AI-powered enhancements
- Luminar Neo – Great for creative HDR styles
Key Post-Processing Tips:
- Enable Auto Align – Corrects minor camera movement.
- Use De-Ghosting – Removes artifacts caused by moving elements (e.g., leaves, people).
- Adjust Tone Mapping – Avoid oversaturation and halos. Aim for natural-looking contrast.
- Fine-Tune in Lightroom – After merging, use global adjustments to balance color, contrast, and clarity.
Avoid the “HDR Look” – Overdone HDR often looks fake, with exaggerated textures and unnatural colors. Strive for subtlety and realism, especially in travel photography where authenticity matters.
Creative Applications of HDR in Travel Photography
As a travel photographer, HDR can help you tell richer visual stories:
1. Cityscapes at Blue Hour
- Capture the last light in the sky and the emerging city lights
- Preserve details in both illuminated buildings and dark streets
2. Historic Interiors
- Churches, mosques, and museums often have stained glass or windows that create extreme contrast
- HDR reveals both the light sources and the artwork in shadow
3. Urban Canyons
- Tall buildings create deep shadows while the sky remains bright
- HDR balances the exposure across vertical cityscapes
4. Markets and Alleyways
- Bright openings leading into dimly lit spaces
- HDR captures the vibrant colors and textures throughout
Common HDR Myths and Misconceptions
Let’s clear up some confusion:
Myth 1: “HDR always looks fake.”
Reality: Poorly processed HDR can look artificial, but skillful blending results in natural, detailed images indistinguishable from single exposures.
Myth 2: “You need special equipment.”
Reality: Any camera with AEB and a tripod will do. Even smartphones now offer HDR modes.
Myth 3: “HDR is only for landscapes.”
Reality: HDR is widely used in real estate, architecture, interiors, and urban photography.
Myth 4: “HDR replaces good exposure.”
Reality: HDR enhances dynamic range but doesn’t excuse poor technique. Proper exposure, composition, and lighting still matter.
HDR in the Age of Smartphones
Modern smartphones have made HDR more accessible than ever. iPhone and Android devices use computational photography to simulate HDR by combining multiple frames instantly.
While convenient, smartphone HDR has limitations:
- Less control over exposure settings
- Smaller sensors with lower dynamic range
- Automated processing may not suit artistic intent
For serious travel photographers, DSLR or mirrorless HDR with manual control still delivers superior quality and creative flexibility.
Tips for Natural-Looking HDR Results
To keep your HDR images authentic and compelling:
- Limit Exposure Bracketing to 3–5 Shots – More isn’t always better.
- Avoid Extreme Tone Mapping – Keep contrast and saturation realistic.
- Use Local Adjustments – Dodge and burn specific areas instead of global HDR effects.
- Shoot During Golden Hour – Soft, directional light reduces contrast, minimizing the need for aggressive HDR.
- Blend Manually if Needed – Use layer masks in Photoshop for precise control over which parts of the image use which exposure.
Final Thoughts: Why HDR Matters for Travel Photographers
As a photographer documenting cities around the globe, your goal is to capture the essence of a place—its light, architecture, culture, and atmosphere. HDR photography is not a gimmick; it’s a practical tool that expands your creative possibilities.
By mastering HDR, you can:
- Overcome challenging lighting conditions
- Reveal details invisible to the naked eye
- Create images that are both technically impressive and emotionally resonant
Whether you’re standing beneath the Eiffel Tower at twilight or exploring the ancient streets of Kyoto, HDR empowers you to bring home photos that truly reflect the beauty and complexity of the world.
So next time you’re faced with a scene where the shadows are too deep and the highlights too bright, don’t walk away. Set up your tripod, bracket your exposures, and let HDR do the rest.
Your audience—and your photo blog—will thank you.